How to print Dated Personal Size Inserts Back to Back
This post contains affiliate links and we will earn commission if you buy the products through those links. For more information, please read our disclosures here
Want to print dated Personal Size Inserts Back to Back? This step by step tutorial makes it easy to learn how to print these printable inserts at home.
I love personal planners because of the size they come in.
At 3.75×6.75 inch they are perfect to carry around without feeling bulky.
And best thing about planner inserts is that you can fit them in your binder year after year, without having to purchase the new binder every year.
How to print Personal planner inserts?
When you purchase Personal Planner Pages or Inserts from here, you get different options to print those files.
For example, you have the option to print on:
- Actual size paper (Personal size in this case),
- A4 size or Letter size paper with trim marks or
- Booklet mode.
Make sure that you are using the correct file among the number of files you receive in the package.
#1. Printing Personal Planner Inserts on Actual (Personal) Size Paper
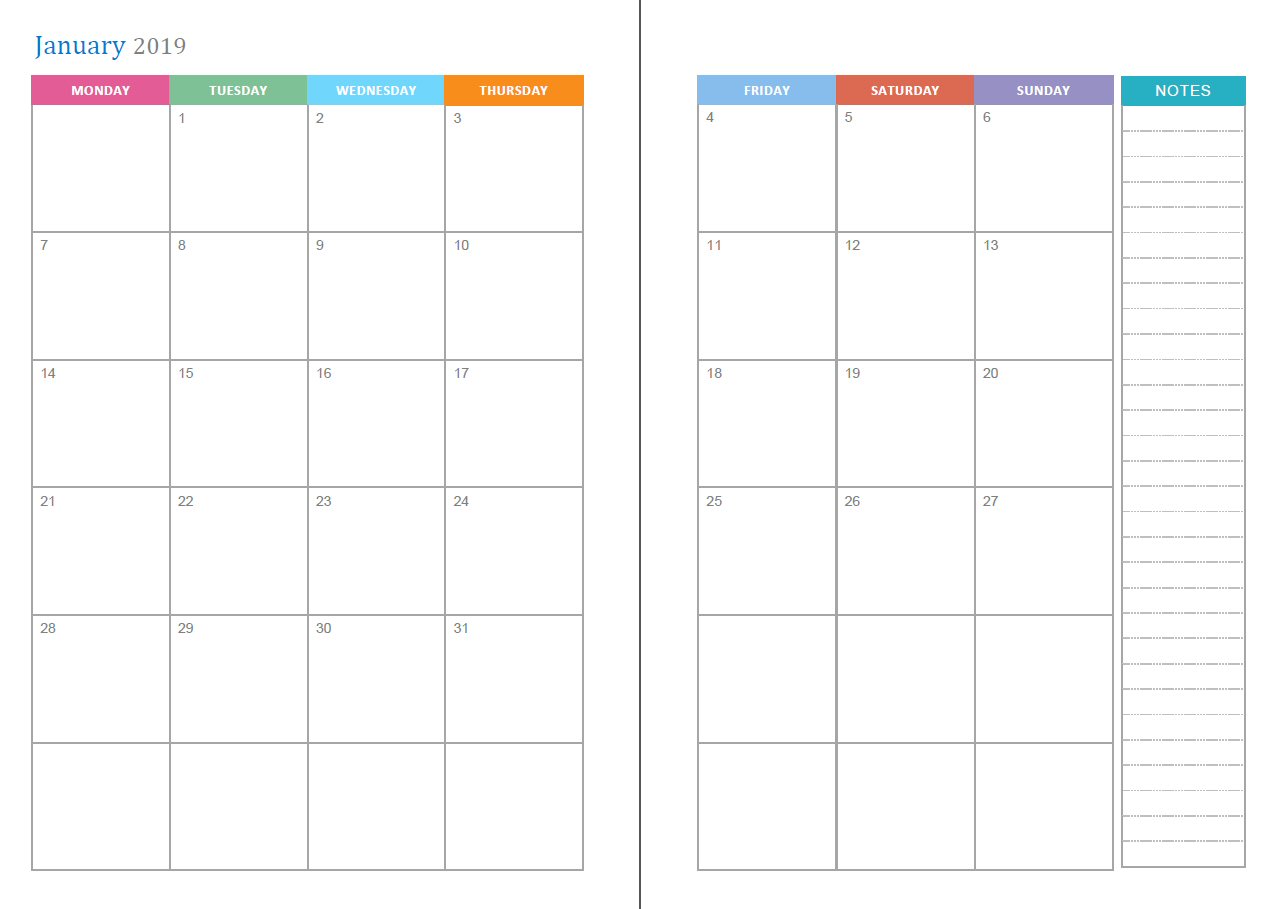
For example, the file with the shortest name with no “A4” or “Letter” is meant to be printed on actual and exact pre-cut personal size paper.
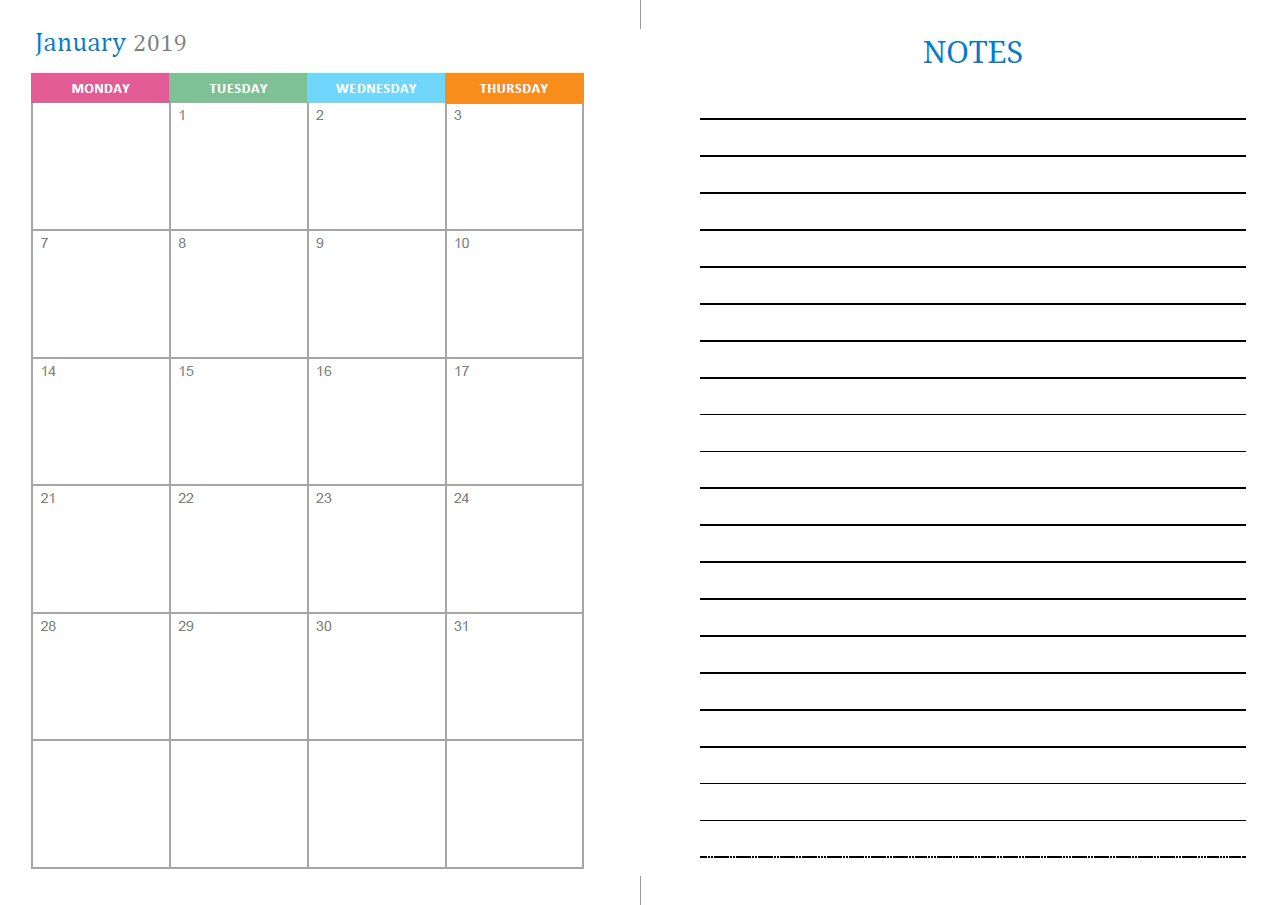
When you open this file, you will see the month or week spread out on the left and right side of the file.
Inner margins are wider in size, so you can use these for ring binders by punching the holes. Something similar to this:
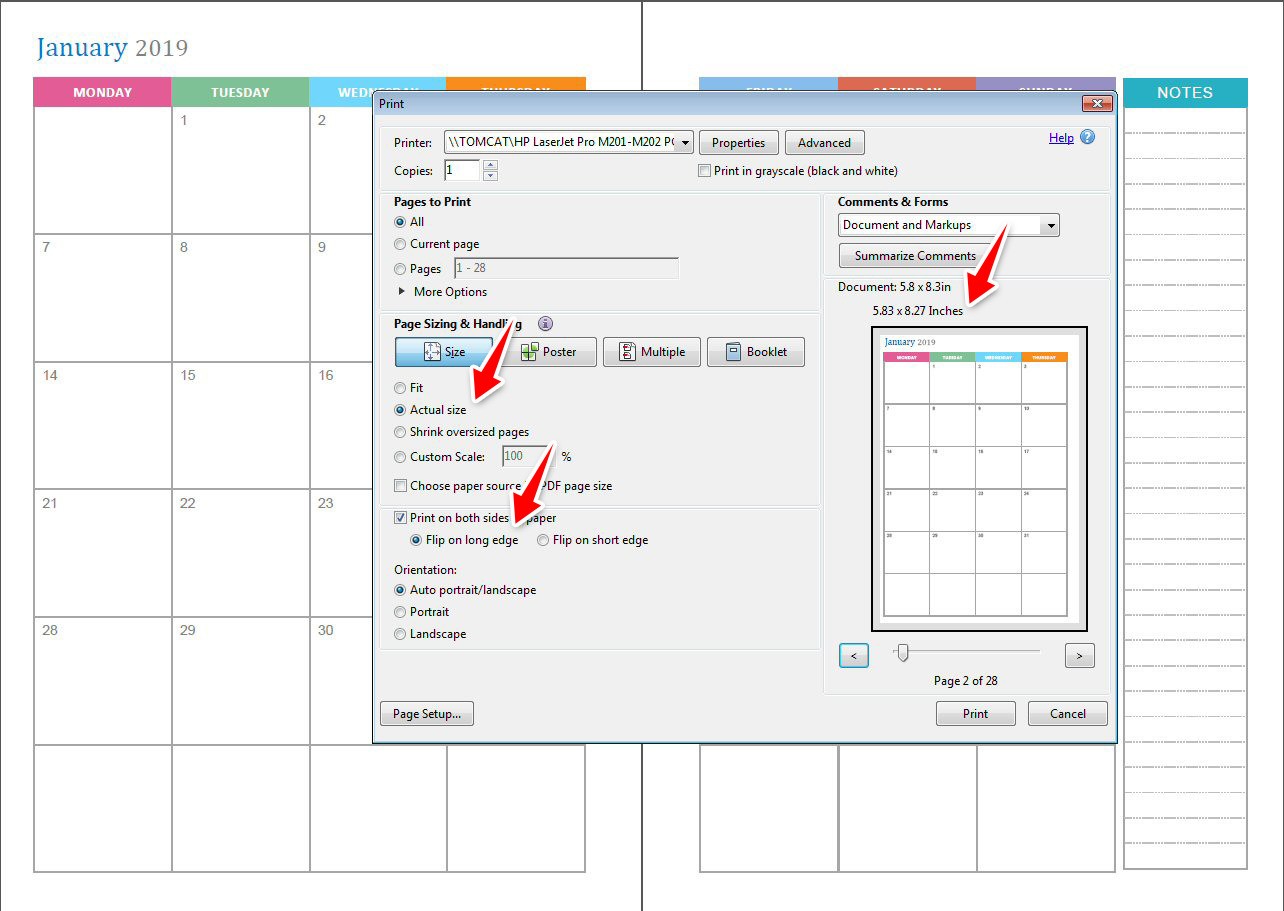
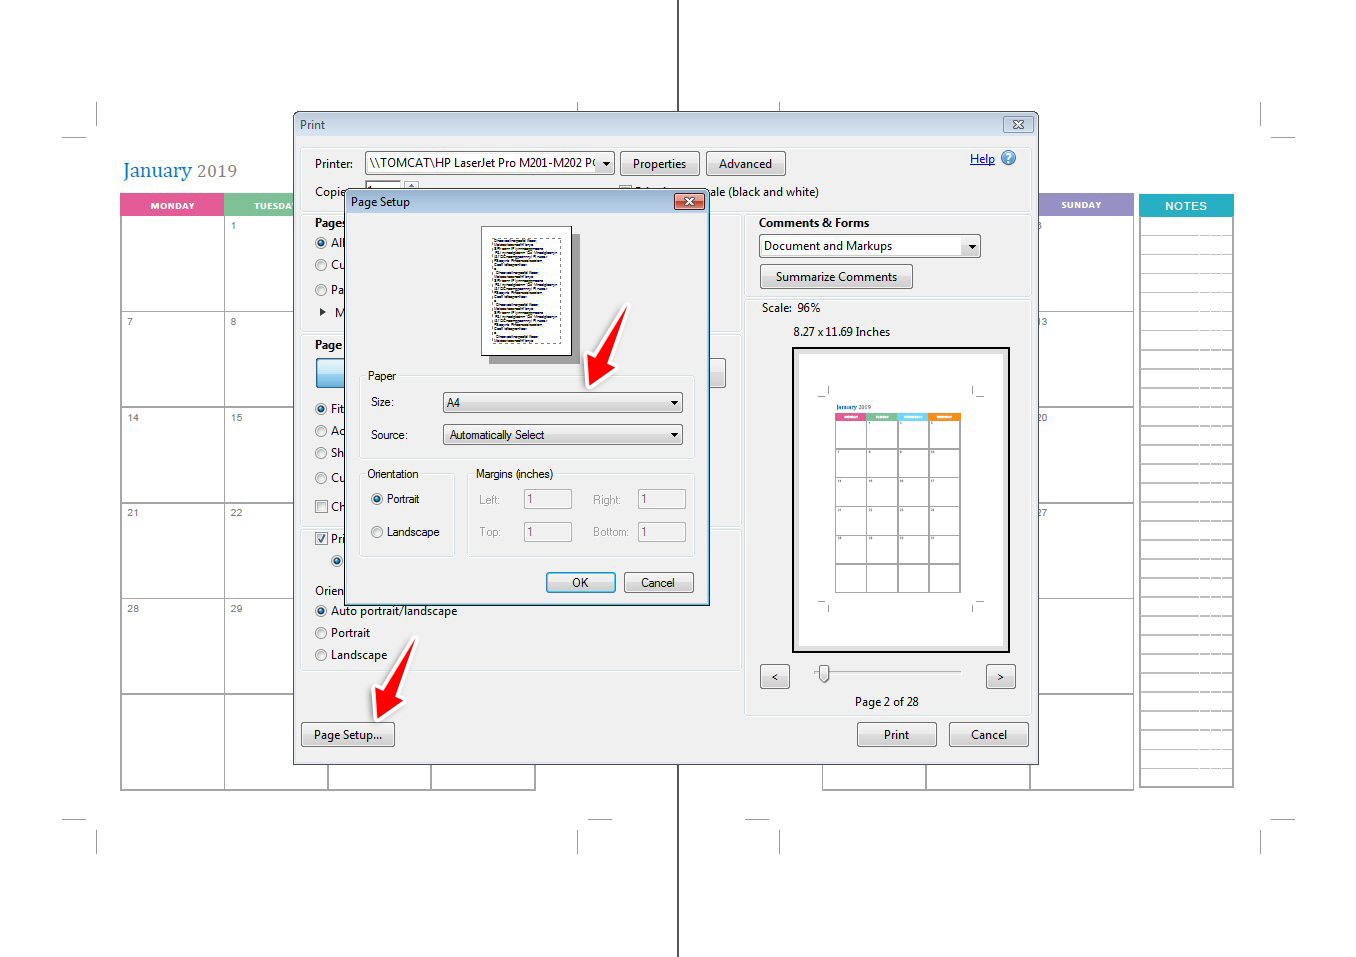
In the printer settings dialog box, Print in 100% or “actual size” settings, check “Print on Both Sides” and select “Flip on long edge“.
#2. Printing Personal Planner Inserts on A4 or Letter Size Paper
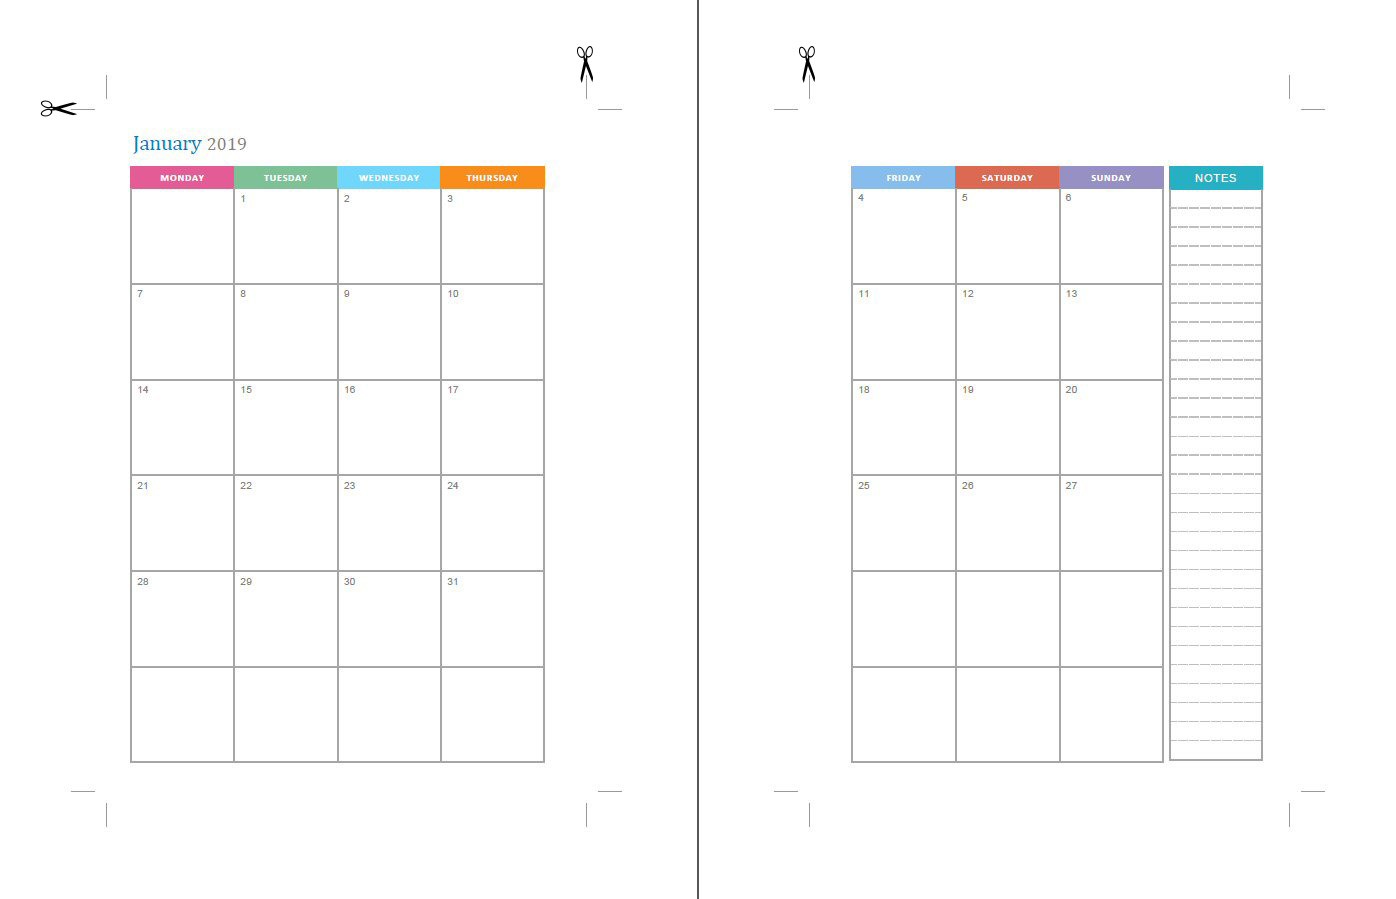
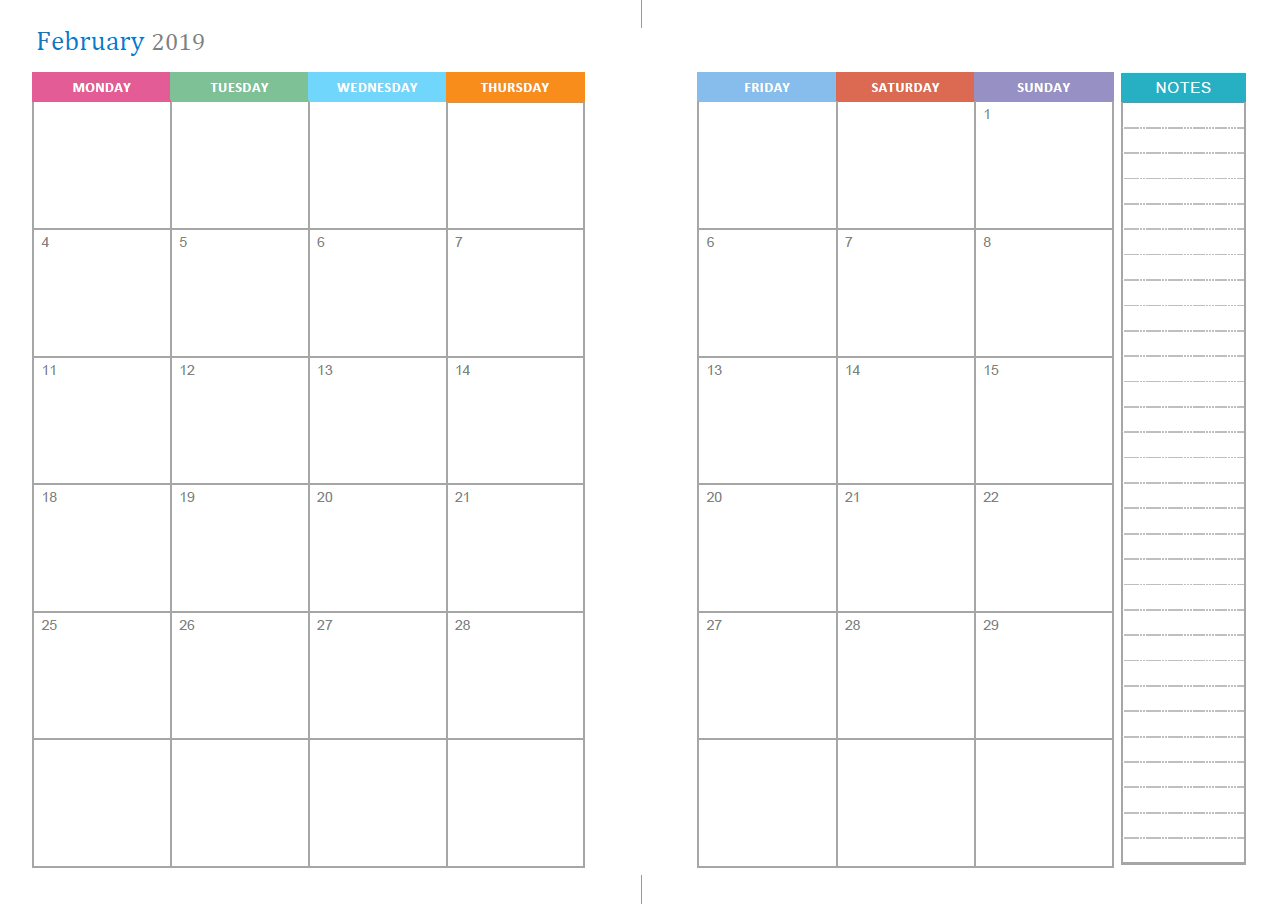
If you used the files that include terms like “trim-marks” with A4 or Letter, that means you will be printing the files that come with trim marks.
This is what the files look like. There are trim marks on the corners of the paper.

You can cut along these trim marks to trim to size after printing.
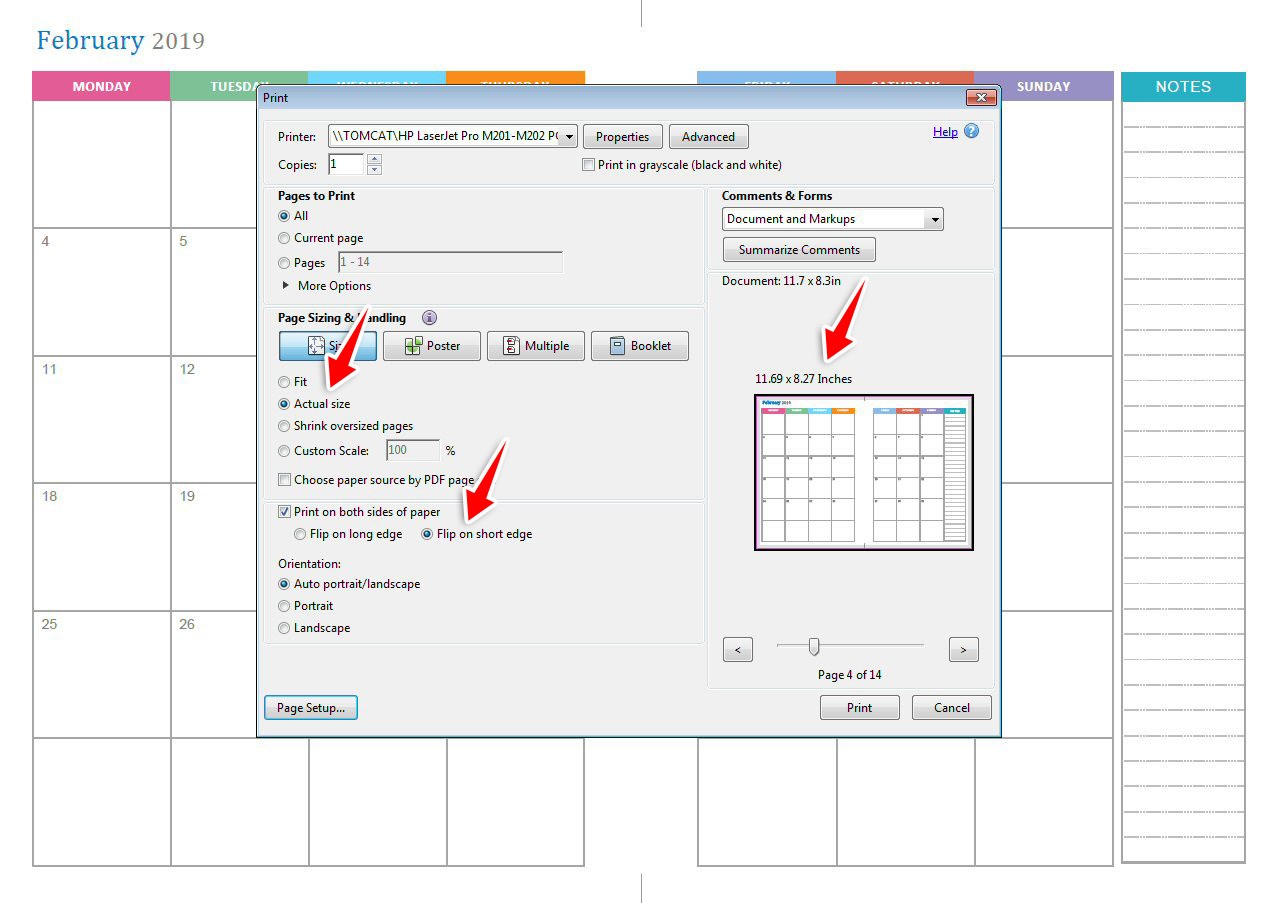
For double sided printing on this option, select the following options from the printer dialog box:
In the printer settings dialog box, Print in 100% or “actual size” settings, check “Print on Both Sides” and select “Flip on long edge“.
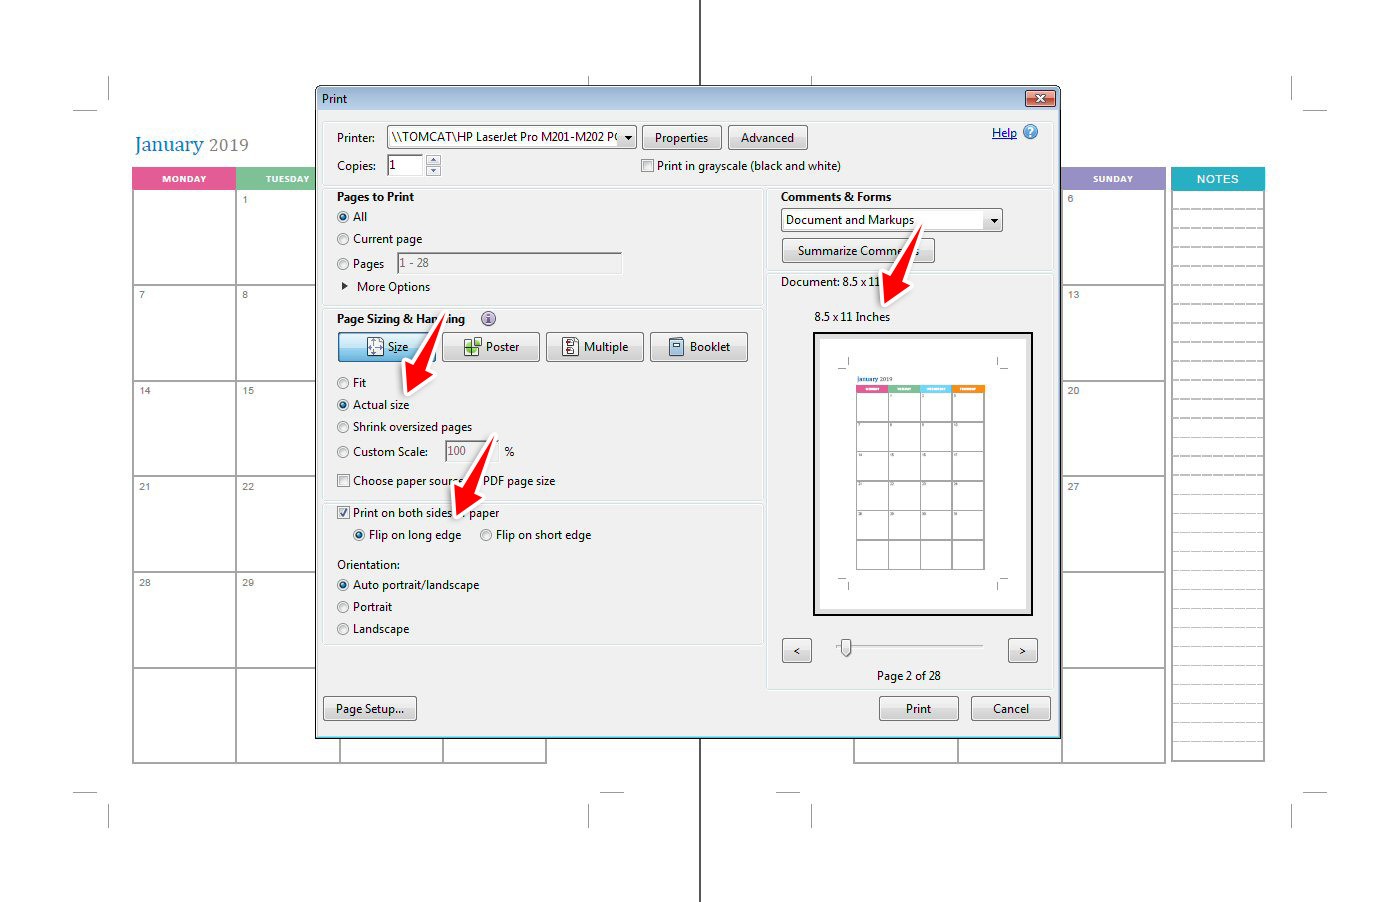
Notice the difference in the page size on top of the page preview box?
You can change the size of the paper by clicking on the Page Setup button and then changing the paper size from the drop down menu.
#3. Printing Personal Planner Inserts in Booklet Mode
If you used the file that includes terms like “booklet-format“, that means you will see two months or weeks spread out on one page, in landscape mode. These files have been specially designed to print in booklet mode.
This is what the pages look like when you open the file:
When you go through the file, the pages may look out of order ….
… but after you are done printing them all and put them together, you will see them sitting in the right order.
Here’s how to print Personal size planner pages in booklet mode:
In the printer settings dialog box, Print in 100% or “actual size” settings, check “Print on Both Sides” and select “Flip on short edge“.
Once you have printed all the pages in booklet mode, using the settings shown above in the printer dialog box, simply pick up the pages in the order they were printed, and pile them from bottom to top.
In case of Monthly Planner Printable Inserts, July month with left and right spread should be on the top. After putting them together in order, simply cut along the line in the middle to punch holes. Or you can simply fold and staple in the middle.
This video shows step by step instructions on how to print in booklet mode:
I hope these instructions to print back to back (double sided) personal size planner inserts were helpful. Please feel free to leave your feedback or comments in the comment section below.